0. Contenido
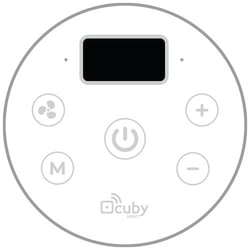
Cuby Aria IR AC

Screw and anchor

Disassembly Accessory
For the installation, you will need the following:
- Drill
- Smartphone with iOS or Android
- WiFi Connection
- Phillips screwdriver
- Hammer
1. Remove the Glass panel
To install the Cuby Aria on the wall, it is necessary to remove the glass panel.

- Locate the slot on the edge of the glass as shown in the image.
 Insert the disassembly accessory into the slot and gently lever it upward, carefully removing the glass panel.

Be careful when removing the glass panel; avoid letting it fall to the ground.
Back of the glass panel
When removing the glass, you will notice that it remains connected to the base in the housing.

2. Installation
Avoid installing the Cuby Aria on the same wall as the air conditioner, as the infrared signal will not reach properly from that position. We recommend installing it on an opposite or side wall.
Place the remote control near the air conditioner in the same room. Ensure that nothing blocks the infrared light emitted by the remote (similar to a small laser) so the air conditioner can receive the signal.

The infrared signal from Cuby Aria is emitted from the openings on the back, as shown in the image. It is possible for the signal to bounce off walls to reach the air conditioner.

Avoid installing directly beneath the air conditioner
The infrared signal must reach the receiver at the front of the A/C. If the Cuby Aria is placed below, the signal will not reach properly.

Side wall to the A/C
In this position, the infrared signal can correctly reach the air conditioner's receiver.
1. Make sure the power switch is turned off before starting the installation.
 2. Position the base of the Cuby Aria on the wall where it will be installed, ensuring the power cables pass through the Cuby Aria and outwards. Mark 2 holes with a pencil.

3. Using a drill and the correct bit (3/16 inch for the anchors provided), make the 2 holes where the screws will go, ensuring the depth is sufficient.
 4. Insert the anchors into the drilled holes.
 5. Screw the back cover of the Cuby Aria to the wall with the arrow on the base pointing upward, as shown in the image.

Identify the N~ (Neutral) and L~ (Line) wires from the wall.

Press the terminal block button, insert the wire, and connect each one to its respective terminal.

Once connected and mounted on the wall, reinsert the glass panel into the housing.
- Align the edge at the bottom of the glass panel as shown in the image.
- Insert the bottom edge into the slot of the Cuby Aria base installed on the wall. (Step 1)
- Push the top part to secure it into the Cuby Aria base (Step 2) until you hear a click. (Step 3)

- Turn the power switch back on.

3. Add Your Cuby Aria IR CA
- Ensure your Cuby Aria is properly connected.
- Open the Cuby App and select the option "Add Cuby.

- Select the option to 'Add Cuby ' and select "Cuby Aria " from the list and follow the steps in the app.
The display on your Cuby Aria should show 'CONFIG' on the screen.

If the screen does not show 'CONFIG,' you will need to put the Cuby Aria into configuration mode by following these steps:
- Locate the 'CONFIG' button on the back of the glass panel.

- To put your Cuby Aria into configuration mode, press the button until the screen displays the message 'CONFIG'.

Continue the process by following the steps as usual to add your Cuby Aria.
Wait for the app to find your Cuby Aria. It should not take more than 1 minute.
If the app does not find the Cuby Aria, ensure that Bluetooth and location services are enabled on your phone.
If, after several attempts, the Cuby Aria is still not detected, restart your phone and try again.
Once your phone detects the Cuby Aria, the app will prompt you to name it. Enter a name that identifies where the Aria will be installed.
Do not use the following words in the name, as they may cause issues when using virtual assistants like Alexa and Google Home:
- 'Air'
- 'Air Conditioner'
- 'Climate'
The words 'Air' and 'Air Conditioner' may cause the assistants to interpret the command as a request for cooling mode or air conditioner mode, preventing the command from being executed correctly.
Wait for Cuby Aria to display the available networks. It may take up to 30 seconds for the network list to appear.
Select your WiFi network from the list that appears. Remember, you can also manually access it by entering the name and password.

- Once you have selected the network you want your Cuby Aria to connect to, enter the password and press 'Next.'
- Wait while your Cuby Aria connects to the WiFi network. This step should not take more than 1 minute.
Done! You have successfully added your Cuby Aria IR CA.
4. Configure the Infrared Signal
The next step is to configure the infrared protocol so that the Cuby Aria can control the air conditioner.
- Ensure that your air conditioner is turned off.
- Place the Cuby Aria in the same room, no more than 6 meters (20 feet) away from the air conditioner.
- Open the app, find your Cuby Aria by its assigned name, and click to start the configuration.
- Follow the steps in the app and tap "Start" to test different protocols.
During the process, Cuby Aria will send a signal to the air conditioner. Each time, the app will ask if the air conditioner turned on or made a beep sound. Tap "Yes" or "No" accordingly. This process is manual and may take a moment to find the correct protocol.
- Once the air conditioner beeps or turns on, press "Yes" so the app displays the extended control.
- Test some of the functions shown in the app. If the air conditioner appears to operate correctly, tap "Works."
If the temperature is not accurate (there’s a degree offset), you can tap the "Does Not Work" option to try other protocols.

5. Test
Make sure that when you press the buttons on the Cuby Aria, the air conditioner responds correctly.
If you have reviewed everything and it still doesn’t work, please contact us.
Avoid removing the control from the wall unless necessary, as doing so frequently may damage the plastic cover.
Conditions of Use
To ensure proper operation and extend the product’s lifespan, the following conditions must be met:
-
Relative Humidity: The product must not be exposed to humidity levels above 90% for prolonged periods, as this may affect its performance and reliability.
-
Heat Exposure: The product should not be placed near heat sources (stoves, radiators, ovens, or other equipment that generates excessive heat).
-
Direct Sunlight: Avoid continuous exposure of the product to solar radiation, as it may alter the operating temperature and damage its internal components.
Failure to comply with these conditions may reduce the device’s lifespan or cause malfunctio