0. PACKAGE CONTENTS
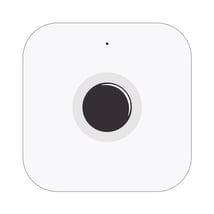
Cuby G4
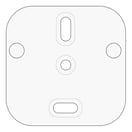
Mounting Accessory
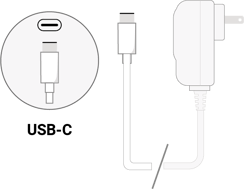
Power adapter
1.- Download the Cuby App.

https://cuby.mx/app/android

https://cuby.mx/app/ios
2. Sign Up or Log In:
If you don't have an account, create a new one using an email address.
If you already have an account, log in with your email and password.
3. Connect Your Cuby G4:
Plug the power adapter into an electrical outlet and connect the USB-C end to the Cuby.


Watch the led indicator
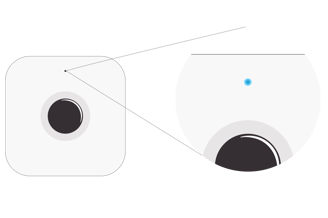
If the LED indicator on your Cuby is not blue, press the button on the back for at least 4 seconds or until the LED indicator turns blue.

4. Add the Cuby in the App:
In the Cuby app, go to the menu and select the 'Add Cuby' option.

Select 'Cuby G4' from the list of devices and follow the on-screen instructions.

Follow the steps in the app and wait for it to find your Cuby. It should take no more than 1 minute to locate it.
If the app fails to find your Cuby, make sure that Bluetooth and Location services are enabled. If, after several attempts, it is still not detected, restart your smartphone and try again.
5. Connect the Cuby to your Wi-Fi network:
Once your phone detects the Cuby, you will be prompted to name it. Enter a name that identifies where the Cuby will be installed.
Do not use the following words in the name, as they may cause issues when using virtual assistants like Alexa and Google Home:
- Air
- Air conditioner
- Climate
The words 'Air' and 'Air conditioner' make assistants think you're requesting cooling or air conditioner mode, and they won’t execute the command correctly.
Name your Cuby according to the room where it is installed.
Select your WiFi network from the list that appears; remember that you can also enter it manually by typing the network name and password.

Enter your Wi-Fi password and press 'Next.'
Wait while the Cuby connects to the network. The LED will temporarily turn green and then turn off to avoid being disruptive at night.
Done! You have successfully added your Cuby.
- Red LED: Not connected to Wi-Fi.
- Yellow LED: Connected to Wi-Fi but without internet access or an IP address.
- Green LED or Off: Connected to the internet and working properly.
- Blue LED: Setup mode.
- White LED: Updating firmware.

Add Cuby G4 – Alternative Without App
If you prefer to set up your Cuby G4 without using the mobile app, follow these steps:
1. Ensure that the Cuby is plugged into a power outlet using the provided power adapter.
2. Hold down the button on the back of the Cuby for about 8 seconds until the LED indicator lights up pink, signaling that it’s in setup mode.
3. On your mobile device or computer, go to WiFi settings and look for a network called "Cuby_XXXXX."
*If a pop-up window appears with a message saying “Internet not available” or “no connection,” click on the option to “Stay connected” or “keep connected,” as applicable.

4. Open a web browser on your device and enter the following address in the address bar: 192.168.4.1
5. Complete with the following information:
-
Nombre del Cuby: Es el nombre que se mostrará en la app para identificar el Cuby.
-
Cuenta de Cuby: La dirección de correo electrónico que usaste para crear la cuenta de Cuby. El Cuby se agregará a esta cuenta, asegúrate de escribirla correctamente.
-
SSID de WiFi: El nombre de la red WiFi; asegúrate de usar el nombre correcto, verificando mayúsculas y minúsculas.
-
Configuración de IP: No modificar a menos que desees configurar una IP estática.
6. Once you've added the data, click “Configure.” A screen will appear to let you know if the configuration was successful.
7. If the setup isn't successful, repeat the process, making sure it doesn't take too long.
Configure IP (Optional):
If you want to assign a static IP to the Cuby, in the "IP Configuration" section, select "Static IP" and provide the necessary details.

4.- Set the A/C protocol.
1. Make sure your air conditioner is turned off.
2. Take the Cuby and point the infrared transmitter at your air conditioner from a distance of less than 3 meters.

The app will test different signals to find the one that controls your air conditioner. Each time the air conditioner makes a sound or turns on, indicate in the app whether it worked or not.
Once you find the correct signal, test some functions from the app to ensure everything works properly.
If the A/C works correctly, tap 'It Works.' If the temperature does not match (there is a degree offset), tap 'It Doesn’t Work' to try other protocols.

Your Cuby should now be functional, and you'll be able to control the A/C normally.
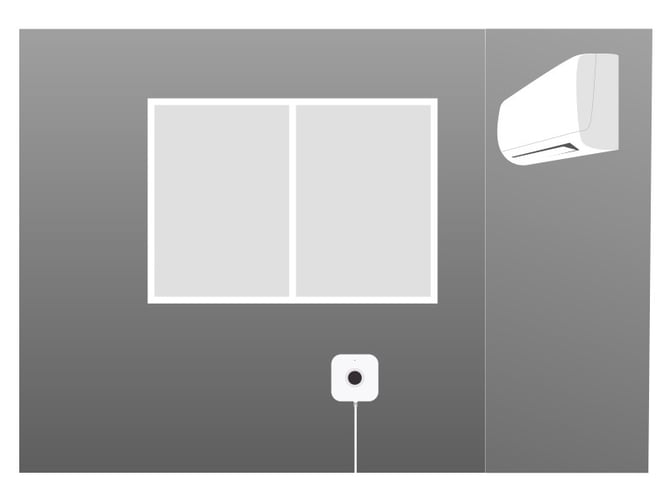
5. Location and Mounting
Avoid having the Cuby's infrared lens blocked by objects or furniture. Ensure it has a clear view of the ceiling or walls.
Do not place the Cuby near other electronic devices or objects that generate heat to prevent interference with the temperature sensor reading.
Also, avoid placing it near a window or in a spot where it receives direct sunlight.
If the ceiling is very high or the room is very large, try placing the Cuby pointing directly at the air conditioner.
Surfaces placement
The simplest way to install the Cuby is to place it on a piece of furniture or any surface within the same room as the air conditioner (in line of sight).

Wall Placement
Another way to install the Cuby is to mount it on the wall using the included mounting accessory. This accessory can be attached with a strong adhesive, such as No More Nails, or screwed in using one or two screws.
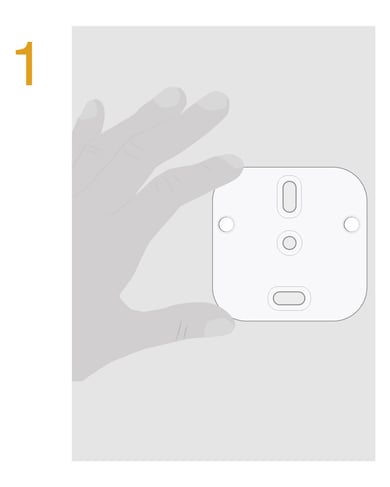
Use the mounting accessory to mark the points to drill.
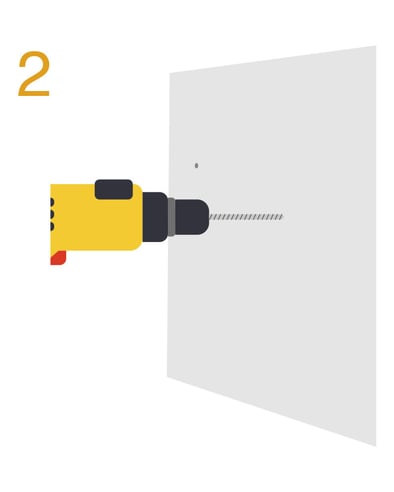
Drill and insert the wall anchors.
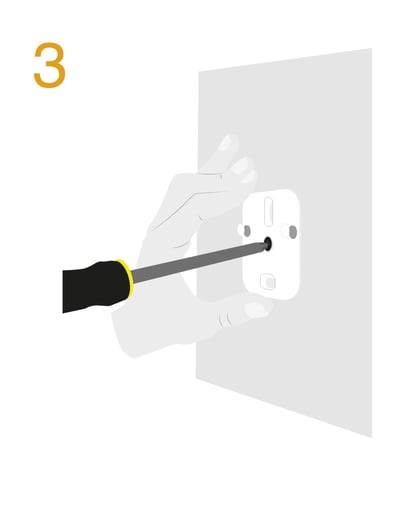
Screw the mounting accessory to the wall.
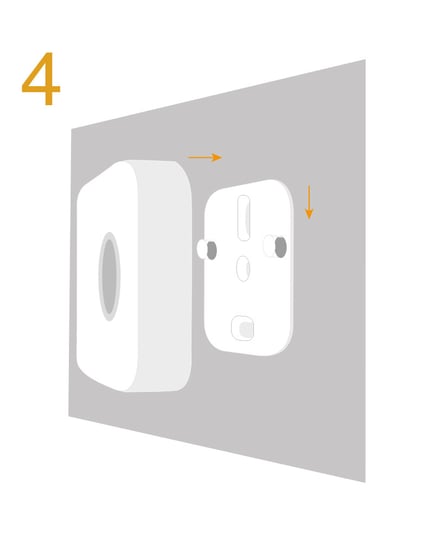
Place the Cuby on the mounting accessory. It requires a bit of force to click into place.
Conditions of Use
To ensure proper operation and extend the product’s lifespan, the following conditions must be met:
-
Relative Humidity: The product must not be exposed to humidity levels above 90% for prolonged periods, as this may affect its performance and reliability.
-
Heat Exposure: The product should not be placed near heat sources (stoves, radiators, ovens, or other equipment that generates excessive heat).
-
Direct Sunlight: Avoid continuous exposure of the product to solar radiation, as it may alter the operating temperature and damage its internal components.
Failure to comply with these conditions may reduce the device’s lifespan or cause malfunctions.