0. Contents
XMatch 2.0

Adapter Cable (UMatch)

Adapter Cable (UMatch)
Connection diagram

1.- Installation
1.- Turn off the power to the air conditioner.

2.- Remove the original thermostat from the wall and unplug the 3-wire harness.
(We recommend not removing this cable completely, in case you want to reconnect your original thermostat in the future).


3.- Locate the 10-pin connector on the evaporator board. If there is more than one 10-pin connector, please contact us.
Evaporator card


4.- Connect the 10-pin end of the included adapter cable to your evaporator board (as shown in the image).

5.- Connect the 4-pin end of the adapter cable to the XMatch.

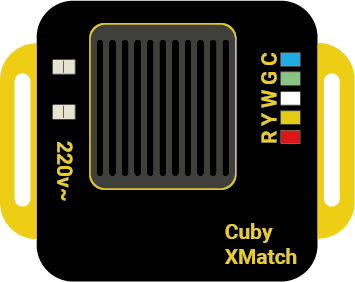
6.- Using a 5-wire cable, connect one end to the XMatch following the indicated color code, and the other end will be connected to the thermostat.

7.- Connect the colored wires to the 24VAC thermostat following the color code.

For heating, the OB connection should not be used, only the W.
The Nest must be configured in electric heating mode with forced air.
8.- Connect the power supply wires to the terminals of the XMatch.

9.- Turn the power back on the air conditioner.

10.- Install your thermostat, and it should turn on correctly.
