0. PACKAGE CONTENTS

Aria
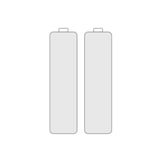
2x AA Batteries

Screw and anchor

Removal accessory
For the following installation, you will need:
1.- Drill
2.- iOS or Android smartphone
3.-WiFi connection
4.-Phillips screwdriver
5.-Hammer
1.- Add your Aria
Make sure that the Cuby G4 to which the Aria will be linked is in your account.
In the main menu of the Cuby Smart app, select the sensors option.
Select the + sign to add a new sensor. Scan the QR code with your phone.

There is an alternative method to view Aria's QR code
Press the Cuby Smart logo at the bottom of the glass panel for 4 seconds, and the QR code will appear on the screen.

Select the Cuby you want to link with the Aria. You can link only one Aria to a single Cuby, and each Cuby can have only one Aria. However, other controls and sensors can be linked to multiple Cubys, and a single Cuby can have multiple sensors.
Once assigned to a Cuby, a screen will appear to set the limits; configure the desired settings for the Aria. This allows you to limit the minimum and maximum temperature of the mini-split.
2.- Test
Ensure that the A/C unit responds correctly when the Aria buttons are pressed. If it does not, make sure the Cuby linked to this Aria is in the same room as the A/C unit and that its infrared transmitter has a clear line of sight to the A/C.
If the Aria is not working, check that it is linked to the correct Cuby. Also, verify that the Cuby can control the air conditioner via the mobile app. An internet connection is required during the setup process.
If you have followed the troubleshooting steps and the issue persists, please reach out to our support team.
3.- Installation
IMPORTANT: Make sure that there are no cables or pipes running inside the wall where the Aria will be installed.
Remove the glass panel
To install the Aria on the wall, the glass panel needs to be removed.
Locate the slot at the edge of the glass as shown in the image.

Insert the removal accessory and leverage it upwards; carefully remove the glass panel.

Be careful when removing the glass panel; avoid letting it fall to the ground.
Position the Aria base on the wall where it will be installed and mark the 4 holes with a pencil.

Using a drill and the correct bit (3/16 inch for the kits we provide), make the 4 holes where the screws will go, ensuring they are deep enough.

Insert the anchors into the holes you made.

Screw the Aria's back cover to the wall with the arrow on the base pointing upward, as shown in the image.

Place the glass panel onto the base
Align the bottom edge of the glass as shown in the image.
First, insert the edge into the slot of the Aria base installed on the wall. (1)
Push the top part to secure it onto the Aria base (2) until you hear a click. (3)

Only remove the control from the wall when necessary (e.g., for battery replacement or relocation), as frequent removal can damage the plastic cover.
Conditions of Use
To ensure proper operation and extend the product’s lifespan, the following conditions must be met:
-
Relative Humidity: The product must not be exposed to humidity levels above 90% for prolonged periods, as this may affect its performance and reliability.
-
Heat Exposure: The product should not be placed near heat sources (stoves, radiators, ovens, or other equipment that generates excessive heat).
-
Direct Sunlight: Avoid continuous exposure of the product to solar radiation, as it may alter the operating temperature and damage its internal components.
Failure to comply with these conditions may reduce the device’s lifespan or cause malfunctio