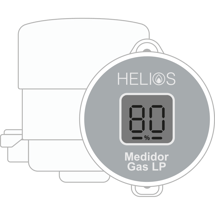
Cuby Helios
Smart LPG gas level meter for stationary tanks
0. PACKAGE CONTENTS

Helios Display

Helios Sensor

Voltage Adapter - USB-C

Screw and anchor

Disassembly Accessory
1. INSTALLATION AND CONFIGURATION
1. Download the Cuby Smart app:
Android:
https://cuby.mx/app/android
2. Create an account and log in.
3.- In the menu of the Cuby Smart App, select the option "Add Cuby".
4.- Then select "Cuby Helios" from the list of devices.

5.- Connect to the power supply and mount the Helios display on the wall using double-sided tape or anchors and screws.


6.- You will be asked if the Helios is in configuration mode or not. The screen should display "CONFIG."


If your Cuby Helios is not in setup mode, follow these steps:
a) Carefully remove the glass panel using the disassembly accessory:

- b) Press and hold the CONFIG button on the back of the glass panel for 5 seconds until the screen displays 'CONFIG':

If you need a visual demonstration, here is a video showing the step-by-step process:
7. Wait for your phone to detect your Helios display.
8. You will be prompted to name your Helios.
9. A list of WiFi networks will appear; select your network and enter the password.

10. Wait a few moments for it to connect to your WiFi network.
11. Once configured, the Helios display will show 'Esperando Configuración' (waiting for communication) on its screen and will be ready to receive readings from the Helios sensor.
Placement Suggestion
The ideal location is in the kitchen, as it includes a gas alarm that can alert you if the stove is accidentally left on.
The power cable can be trimmed to the desired length to avoid excessive slack.
Avoid placing it too close to the stove, as this may result in inaccurate readings and trigger the alarm.
Installation of the Helios Sensor
- Locate and remove the original cover of your stationary tank by removing only the 2 screws holding it to the float.


2. Place the Helios sensor in place of the cover, ensuring it is correctly oriented. Observe the triangular and square markings on the base of the Helios sensor.

As a reference, note that the triangular part of the Helios sensor base should face the direction in which your tank's lid opens.

3. Use the 2 included screws to attach the Helios sensor to the tank. Ensure it is screwed in tightly until it stops, without stripping the threads.
If the screws are not properly secured, the sensor may suffer damage from water, dust, or other elements.


4. Once the Helios Sensor is installed, it will start reporting readings. It is necessary to wait a couple of hours for the reading to stabilize.

5. At this point, the percentage should already be visible on your phone and on the Helios display.
Additional Points
A) Real-time readings
- The gas meter reports readings with the following frequency:
- Every 2 hours.
- Immediately when it detects a change of more than 0.5%.
- Continuously while gas is being refilled, stopping when the refill ends.
- Immediately upon removal or placement on the gas tank.
B) Distance between Helios Display and Helios Sensor
- The connection between the two units is extremely long-range, reaching up to 1 km (line of sight).
- When passing through walls, the signal weakens but should still cover 99.99% of cases without any signal issues.
C) Battery life
- The sensor is designed for extreme efficiency, with an average battery life of 5 years.
- The battery is replaceable and uses a CR123A battery.
- The app indicates the current battery level (approximate) and sends alerts when it is low.
D) Connectivity
- The indoor unit connects to the internet using WiFi (2.4GHz) and doesn’t need to be near the tank. Its ideal location is the kitchen.
- The outdoor unit (gas sensor) uses a high-range wireless communication to connect with the indoor unit.
- The outdoor unit is wireless, does not require WiFi, and can be used anywhere in the world.
E) Accuracy
- The gas meter is highly accurate, with an error margin of less than 2% and a resolution of 0.1%.
F) Water and Sunlight Protection
- The outdoor unit (gas meter) is water and sunlight-resistant, with IP68 protection.
- However, it is recommended to keep the tank’s lid closed to increase its lifespan and protect it from high temperatures.
H) Statistics
G) Alarms and Alerts
-
The indoor unit features several alarms and alerts, some of which sound locally (via a built-in buzzer), while others are sent remotely. Voice call alerts (calls to your phone) can also be configured by adding a phone number.
- a) Emits a sound alarm and displays the issue on the screen.
- b) Sends a push notification to the phone.
- c) Generates a phone call and SMS (if one or more phone numbers are configured).
-
Low Gas Level Alert
- When the gas level drops below the configured limit, a PUSH notification is sent to the phone.
-
Sensor Removed Alert
- If someone removes the sensor from the tank, a PUSH notification is sent to the phone.
-
High Temperature Alert
- If the gas meter detects high temperatures, a PUSH notification is generated.
-
Water Ingress Alert
- If the gas meter detects high humidity levels inside its plastic enclosure, a PUSH notification is generated.
-
Sensor Failure Alert
- If the gas meter detects a failure in its gas level sensor, a PUSH notification is generated.
-
Low Battery Alert
- If the sensor’s battery is low, a PUSH notification is generated.
- The Cuby system saves gas level data for 3 years and displays usage statistics and gas levels, including:
- Current gas level.
- Average daily consumption (calculated based on the last 60 days).
- Remaining gas time (estimates how many days of gas are left).
- Gas level graph showing how the gas level decreased and when gas was refilled.
- Gas refill events with date, time, and quantity refilled.
- Alarm and alert events, which are also stored in the system.
I) Sharing Access
- You can share access to one or more gas tanks with others via the Cuby app. To do so, follow these steps:
- The person you’re sharing access with must first create an account in the Cuby app.
- The Cuby Helios administrator must go to the device settings and select the “Share” option.
- Enter the email address the other person used to create their account, and once accepted, the tank will be shared.
- Shared access can be revoked at any time.
